From inside (document excerpt):
V150D OWNER’S MANUAL U.S.A.Edition LIT-18626-05-88 64K-28199-10 EMU25060 ZMU01690 Read this owner’s manual carefully before operating your outboard motor. Important manual information EMU25100 To the owner Thank you for choosing a Yamaha outboard motor. This Owner’s Manual contains information needed for proper operation, maintenance and care. A thorough understanding of these simple instructions will help you obtain maximum enjoyment from your new Yamaha.
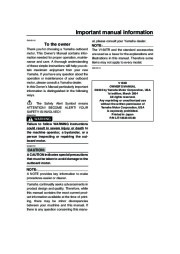
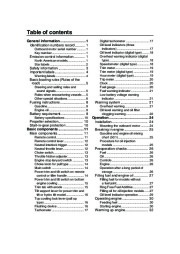
If you have any question about the operation or maintenance of your outboard motor, please consult a Yamaha dealer. In this Owner’s Manual particularly important information is distinguished in the following ways. The Safety Alert Symbol means ATTENTION! BECOME ALERT! YOUR SAFETY IS INVOLVED! EWM00780 al, please consult your Yamaha dealer. NOTE: The V150TR and the standard accessories are used as a base for the explanations and illustrations in this manual. Therefore some items may not apply to every model. EMU25110 WARNING Failure to follow WARNING instructions could result in severe injury or death to the machine operator, a bystander, or a person inspecting or repairing the outboard motor. ECM00700 V150D OWNER’S MANUAL 2004 by Yamaha Motor Corporation, USA 1st edition, March 2004 Any reprinting or unauthorized use without the written permission of Yamaha Motor Corporation, USA is expressly prohibited. Printed in Japan P/N LIT-18626-05-88 CAUTION: A CAUTION indicates special precautions that must be taken to avoid damage to the outboard motor. NOTE: A NOTE provides key information to make procedures easier or clearer. Yamaha continually seeks advancements in product design and quality. Therefore, while this manual contains the most current product information available at the time of printing, there may be minor discrepancies between your machine and this manual. If there is any question concerning this manu- Table of contents General information 1 Identification numbers record 1 Outboard motor serial number 1 Key number . 1 Digital tachometer . 17 Oil level indicators (three indicators) . 17 Oil level indicator (digital type) 18 Overheat warning indicator (digital type) 18 Speedometer (digital type) 18 Trim meter . 19 Trim meter (digital type) 19 Hour meter (digital type) 19 Trip meter 20 Clock . 20 Fuel gauge 20 Fuel warning indicator . 21 Low battery voltage warning indicator 21 Emission control information . 1 North American models . 1 Star labels . 2 Safety information . 3 Important labels . 4 Warning labels 4 Basic boating rules (Rules of the road) 5 Steering and sailing rules and sound signals 5 Rules when encountering vessels 5 Other special situations . 6 Fueling instructions . 8 Gasoline 9 Engine oil 9 Warning system 21 Overheat warning 21 Oil level warning and oil filter clogging warning . 22 Battery requirement . 9 Battery specifications 10 Propeller selection . 10 Start-in-gear protection . 10 Basic components 11 Main components 11 Remote control 11 Remote control lever . 12 Neutral interlock trigger . 12 Neutral throttle lever 12 Choke switch . 13 Throttle friction adjuster . 13 Engine stop lanyard switch . 13 Choke knob for pull type . 14 Main switch . 14 Power trim and tilt switch on remote control or tiller handle . 14 Power trim and tilt switch on bottom engine cowling 15 Trim tab with anode 15 Tilt support lever for power trim and tilt or hydro tilt model . 16 Top cowling lock lever (pull up type) 16 Flushing device . 16 Tachometer . 17 Operation . 24 Installation . 24 Mounting the outboard motor 24 Breaking in engine 25 Gasoline and engine oil mixing chart (50:1) 25 Procedure for oil injection models 25 Preoperation checks . 26 Fuel . 26 Oil 26 Controls . 26 Engine . 26 Operation after a long period of storage 26 Filling fuel and engine oil 27 Filling fuel for models without a fuel joint 27 Ring Free Fuel Additive . 27 Filling oil for oil injection models 27 Oil level indicator operation . 29 Operating engine 30 Feeding fuel 30 Starting engine 30 Warming up engine . 32 Table of contents Choke start models . 32 Shifting 32 Forward (tiller handle and remote control models) . 33 Reverse (automatic reverse lock and power trim and tilt models). 33 Stopping engine 33 Procedure . 33 Trimming outboard motor 34 Adjusting trim angle 34 Adjusting boat trim 35 Tilting up and down . 36 Procedure for tilting up 36 Procedure for tilting down . 37 Checking propeller 53 Removing the propeller . 54 Installing the propeller . 54 Changing gear oil 55 Inspecting and replacing anode(s) 55 Checking battery (for electric start models) . 56 Connecting the battery 57 Disconnecting the battery 58 Checking top cowling 58 Coating the boat bottom 58 Cruising in shallow water 38 Power trim and tilt models / power tilt models 38 Trouble Recovery 59 Troubleshooting 59 Temporary action in emergency. 62 Impact damage . 62 Replacing fuse 62 Power trim and tilt will not operate 63 Starter will not operate 63 Emergency starting engine . 64 Cruising in other conditions . 39 Maintenance . 40 Specifications 40 Transporting and storing outboard motor . 41 Storing outboard motor . 41 Procedure . 41 Lubrication (oil injection models). 42 Battery care . 43 Flushing power unit . 43 Cleaning the outboard motor 44 Checking painted surface of motor . 44 Engine fails to operate 65 Ignition system malfunction . 65 Low oil level warning activates 65 Treatment of submerged motor 66 Procedure 66 Periodic maintenance 45 Replacement parts 45 Maintenance chart 46 Greasing . 48 Cleaning and adjusting spark plug 48 Checking fuel system 49 Inspecting fuel filter . 50 Cleaning fuel filter . 50 Inspecting idling speed . 51 Checking water in engine oil tank. 51 Checking wiring and connectors . 51 Exhaust leakage . 52 Water leakage . 52 Checking power trim and tilt system 52 Consumer information . 68 Important warranty information for U.S.A. and Canada .


 Yamaha Motor Owners Manual, 2005 - 1 of 81
 Yamaha Motor Owners Manual, 2005 - 2 of 81
 Yamaha Motor Owners Manual, 2005 - 3 of 81
 Yamaha Motor Owners Manual, 2005 - 4 of 81
 Yamaha Motor Owners Manual, 2005 - 5 of 81
 Yamaha Motor Owners Manual, 2005 - 6 of 81
 Yamaha Motor Owners Manual, 2005 - 7 of 81
 Yamaha Motor Owners Manual, 2005 - 8 of 81
 Yamaha Motor Owners Manual, 2005 - 9 of 81
 Yamaha Motor Owners Manual, 2005 - 10 of 81